Unlocking Pure Flavor: The Magic of Homemade Vanilla Extract
Imagine a world where every cookie, cake, and custard you bake boasts an unparalleled depth of flavor, a rich aromatic essence that store-bought vanilla often misses. That world is easily within reach when you embrace the simple, rewarding journey of making your own
homemade vanilla extract. It's not just a kitchen project; it's an investment in superior baking, significant savings, and the sheer joy of creating something truly special.
For many years, home bakers have discovered that crafting their own pure vanilla extract is the secret weapon to elevate everything from everyday desserts to gourmet creations. The process is surprisingly straightforward, requiring minimal active time, and the benefits extend far beyond your pantry, making it an ideal personal indulgence or a thoughtful, high-quality gift. With just a few basic ingredients and a dash of patience, you can transform your baking and embark on a delicious adventure.
Why Craft Your Own Homemade Vanilla Extract?
The allure of
homemade vanilla extract goes far beyond mere novelty. It offers a multitude of advantages that make it a cornerstone for any serious home baker.
Superior Flavor and Quality
This is, without a doubt, the primary motivator. Commercial vanilla extracts, while convenient, often contain additives, artificial flavors, or are made with lower-quality beans. When you make your own, you control the ingredients, ensuring a pure, unadulterated flavor that is rich, complex, and free from any chemical aftertaste. The slow, natural infusion process allows the full spectrum of vanilla bean notes to develop, resulting in an extract that truly shines in your recipes.
Significant Cost Savings Over Time
High-quality pure vanilla extract can be surprisingly expensive in stores. However, the initial investment in vanilla beans and alcohol for homemade versions quickly pays off. Once your extract is ready, the ability to refill your bottles using the same vanilla beans for a second batch dramatically reduces your long-term costs. This economic advantage makes premium vanilla accessible to everyone. For more gifting ideas and clever ways to save, check out
homemade vanilla extract - Article 1.
Complete Customization and Personalization
Making your own extract gives you the freedom to experiment. You can choose specific vanilla bean origins, select different types of alcohol, or even blend varieties to create a unique flavor profile perfectly suited to your palate or specific baking projects. This level of customization is simply not available with store-bought options.
The Perfect Gift for Fellow Foodies
Bottles of homemade vanilla extract make incredibly thoughtful and luxurious gifts. They demonstrate care, effort, and a gourmet touch that store-bought items simply can't replicate. Paired with a pretty label and a ribbon, it's a gift that keeps on giving, both in flavor and the memory of your generosity.
Sustainability and Reduced Waste
The refillable nature of homemade extract means less waste. Instead of constantly buying new bottles, you simply top up your existing ones, often extending the life of your vanilla beans for multiple batches, making it an environmentally friendlier choice.
The Essential Ingredients for Superior Vanilla Extract
Creating truly exceptional
homemade vanilla extract hinges on selecting the right ingredients. It's a simple list, but understanding the nuances of each component will dramatically impact your final product.
Vanilla Beans: The Heart of the Flavor
The vanilla bean is where all the magic begins. Don't skimp on quality here; it makes all the difference.
*
Grade A vs. Grade B: You'll typically encounter two grades. Grade A (Gourmet) beans have a higher moisture content (above 25%), making them plump and pliable, ideal for scraping seeds directly into desserts like ice cream or crème brûlée. Grade B (Extract Grade) beans have a lower moisture content (less than 25%), which makes them drier but concentrates their flavor. This lower moisture content is perfect for extract, as they brew for a longer time, producing a stronger, more robust vanilla flavor, and are often less expensive. While Grade B is preferred for extract, Grade A beans will absolutely work if that's what you have on hand.
*
Origin Matters: Different regions produce vanilla beans with distinct flavor profiles:
*
Madagascar (Bourbon) Vanilla Beans: The most common and widely recognized flavor. They offer a classic, rich, creamy, and sweet vanilla aroma that’s versatile for almost any recipe.
*
Tahitian Vanilla Beans: Known for their floral, fruity, and cherry-like notes, often with hints of anise. They lend themselves beautifully to fruit-based desserts or lighter pastries.
*
Mexican Vanilla Beans: These tend to be smoky, spicy, and woody, with undertones of clove and nutmeg. Excellent for chocolate-based desserts or richer bakes.
Experimenting with different origins or even blending them can lead to fascinating and unique extracts.
*
Quantity: A good rule of thumb is to use 4-5 high-quality vanilla beans for every 8 ounces (1 cup) of alcohol. This ratio ensures a potent, well-rounded extract.
Alcohol: The Extraction Medium
The alcohol acts as a solvent, gently pulling the complex vanilla flavors from the beans over time. The type of alcohol you choose can subtly influence the final taste.
*
Vodka: This is the most popular choice for
homemade vanilla extract, and for good reason. Being largely flavorless, 80-proof vodka provides a neutral base that allows the pure vanilla flavor to shine through unobstructed. Any cheap brand of 80-proof (40% alcohol by volume) vodka will work perfectly.
*
Other Options for Flavor Variation:
*
Brandy: Imparts warm, slightly fruity, and caramel notes, complementing rich desserts beautifully.
*
Rum: Adds a sweet, molasses undertone, perfect for Caribbean-inspired bakes or anything with chocolate and coconut.
*
Bourbon: Contributes a smoky, woody, and slightly sweet flavor, fantastic for pecan pies, cookies, or anything that benefits from a deeper, more robust vanilla.
When selecting, always opt for 80-proof alcohol. Higher proofs can extract flavors more quickly but may also have a harsher alcohol taste that takes longer to mellow.
Glass Jars and Essential Tools
*
Glass Jars: Mason jars are excellent for everyday personal use due to their affordability and availability. For gifting, consider decorative glass bottles with tight-fitting lids. Ensure they are clean and sterilized.
*
Funnel: Invaluable for neatly pouring alcohol into bottles, especially those with narrow necks.
*
Sharp Knife: Essential for scoring or cutting your vanilla beans.
Step-by-Step Guide to Making Homemade Vanilla Extract
The beauty of making
homemade vanilla extract lies in its simplicity. With just five minutes of active preparation, you'll be well on your way to artisanal vanilla.
1.
Prepare Your Vanilla Beans
Using a sharp knife, gently cut one or two slits lengthwise down each vanilla bean. The goal is to expose the tiny vanilla seeds inside and create more surface area for the alcohol to penetrate. This isn't about splitting the bean completely in half (though you can if you wish); rather, it's about making incisions that allow the flavor to infuse more efficiently. If your beans are too long to fit into your chosen jar, cut them in half crosswise.
2.
Place Beans in Jars
Carefully place the scored or cut vanilla beans into your clean glass jar or bottle. For an 8-ounce jar, aim for 4-5 beans. Don't crowd them too much; allow them a little space.
3.
Add the Alcohol
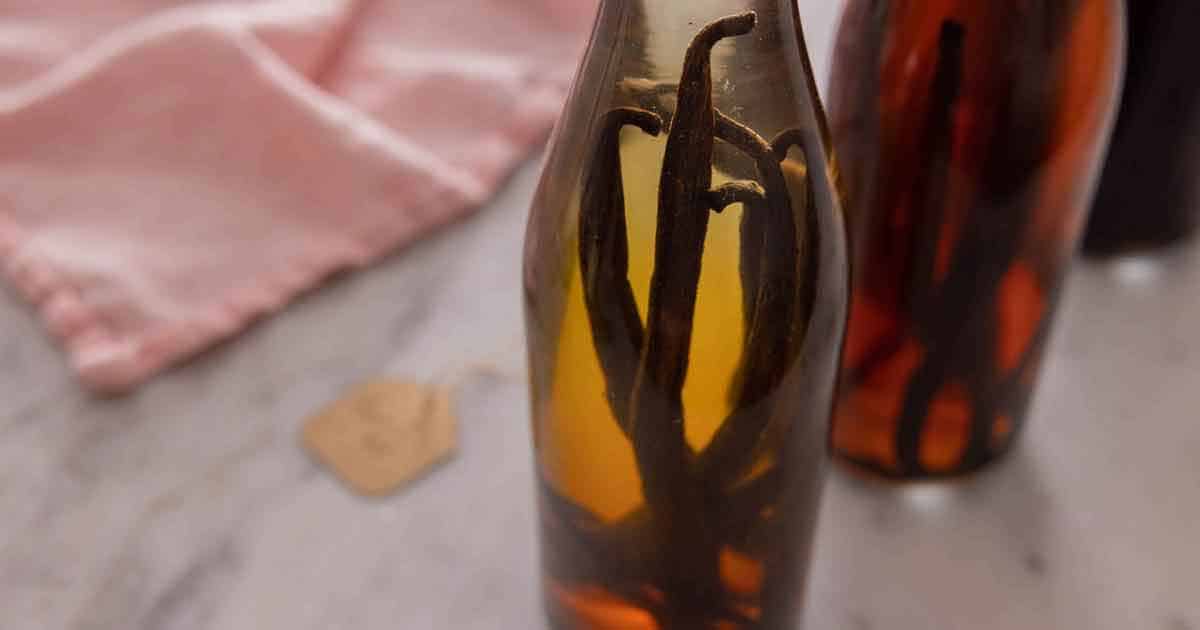
Using a funnel to prevent spills, slowly pour your chosen 80-proof alcohol over the vanilla beans. The most critical step here is to ensure that the vanilla pods are *fully submerged* in the alcohol. Any part of the bean exposed to air could risk mold growth and improper extraction. Fill the jar almost to the brim, leaving a small headspace.
4.
Seal and Shake
Secure the lid tightly on your jar or bottle. Give it a gentle shake to help distribute the alcohol and begin the infusion process. This initial shake helps to coat the beans evenly.
Mastering the Art of Aging and Refilling Your Vanilla
Once your jars are sealed, the real work begins – the patient wait for nature to work its magic. This "set it and forget it" stage is where your
homemade vanilla extract truly develops its character.
The Patience Factor: Why 6 Months?
While you might start to smell vanilla after a few weeks, true, rich vanilla extract takes time to develop. The recommended aging period is a minimum of 6 months. During this time, the alcohol slowly extracts vanillin and hundreds of other aromatic compounds from the beans, resulting in a complex, full-bodied flavor. Think of it like aging fine wine or whiskey; the longer it sits, the more nuanced and developed the flavors become.
*
Storage: Store your vanilla extract in a cool, dark place, such as a pantry or cupboard, away from direct sunlight or heat fluctuations. This environment promotes steady extraction and prevents degradation of flavor.
*
Occasional Shakes: Give your jar a gentle shake every week or two during the aging process. This helps to redistribute the beans and ensure even exposure to the alcohol, leading to a more consistent flavor profile.
*
Testing for Readiness: While 6 months is the standard, you can certainly taste your extract after 2-3 months. If it's not strong enough for your liking, simply let it continue to age. You'll know it's ready when it has a deep, rich aroma and a robust vanilla flavor that stands up in your baking.
The Refill Revolution: Extending the Life of Your Beans
One of the most impressive benefits of making
homemade vanilla extract is its refillable nature. This not only saves you money but also maximizes the use of your precious vanilla beans.
*
How to Refill: As you use your extract and the liquid level starts to get low (say, about halfway down the bottle), simply top it up with fresh 80-proof alcohol. Make sure the beans are still fully submerged.
*
Bean Longevity: High-quality vanilla beans typically have enough flavor compounds to infuse at least two full batches of extract. This means your initial set of beans can yield double the amount of extract over their lifespan.
*
When to Replace Beans: After about two batches, or when you notice the flavor of your extract becoming significantly weaker even after sufficient aging, it's time to replace the old beans with fresh ones. You can compost the spent beans or even dry them and grind them into vanilla powder for other uses. For advanced tips on maximizing your bean usage and maintaining extract quality, delve into
homemade vanilla extract - Article 3.
Conclusion
Embracing the world of
homemade vanilla extract is a delightful journey that promises to transform your baking. It’s a simple, cost-effective, and deeply rewarding project that puts superior flavor and quality right at your fingertips. From the joy of selecting your favorite vanilla beans and alcohol to the anticipation of its rich aroma developing, every step is a testament to the power of homemade goodness. So, gather your ingredients, set aside a few minutes, and prepare to elevate your culinary creations to new heights with your very own handcrafted vanilla extract. Your taste buds (and your baked goods) will thank you!